Atari Punk Console is one of my all time favorite synth. It’s a combination of two 555 timer chip (or IC 556) oscillator which produced 2 layers of square wave sounds. Atari Punk Console (APC) is a name given by Kaustic Machines crew because of the “low-fi” sound it produced is similar to the games from Atari Consoles in the 80’s, with square wave similar from Atari 2600. In this tutorial I’m giving schematic, EagleCad files and PCB design of APC using NE556 Integrated Circuit. Check out the video above to hear how it sounds :)

Schematic
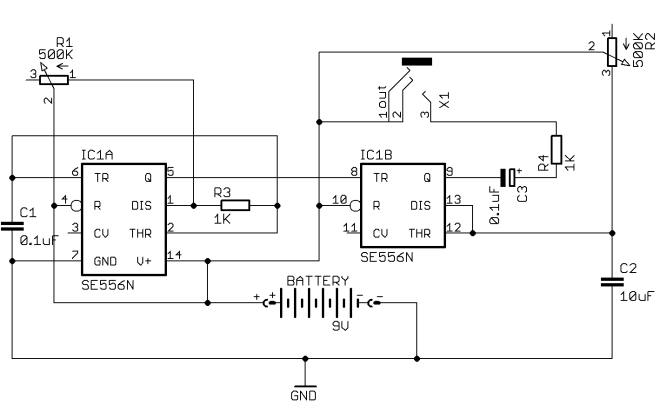
Part List
- C1 0.1uF C2 0.1uF C3 10uF
- 9V Battery Clips
- IC1 NE556N S
- Audio mini jack out mono
- R1 pot 500K R2 pot 500K R3 1K R4 1K
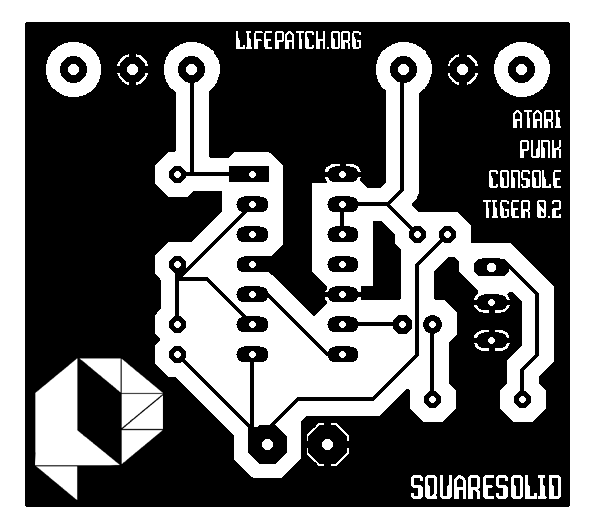
PCB Layout

PCB Print (Non Inverted)
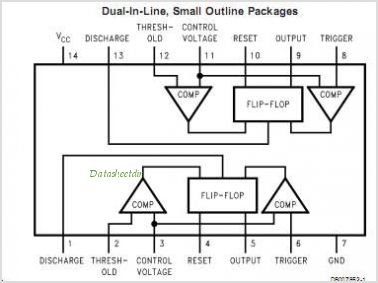
NE556 Pinout diagram
Atari Punk Console EagleCad Schematic File download: [>>link<<]
Atari Punk Console EagleCad Board File download: [>>link<<]

Thanks !
you’re welcome!
Pingback: Sinau Skema Sirkuit Sintesis Suara Sob [workshop] | andreas siagian
Pingback: Sinau Skema Sirkuit Sintesis Suara Sob [workshop] «
Thank you for posting your board design. I was able to successfully make my first etched PCB from your print! One question I had was: are you using through-hole vias to mount the components on the same side as the copper traces, or did you use a different approach? It was a little difficult for me to tell from the reference photos and video compared to the PCB print.
Unfortunately, the dropbox links to the EagleCAD schematic and the PCB layout appear to be dead… :-(